

串口是许多试验的根底,能够作为其他试验运转的验证。在做LPC1114 UART试验时,发现的例程只要发送函数,并且是发送字符串的,所以自己完善了一些,添加了一个发送字符串的函数UARTSendByte(),一个承受字符的函数UARTReceiveByte(),一个承受字符串函数UARTReceive()。详细的代码如下:
// 发送字符函数
/*****************************************************************************
** Function name:UARTSendByte
**
** Descriptions:Send a block of data to the UART 0 port based
**on the data Byte
**
** parameters:send data
** Returned value:None
**
*****************************************************************************/
void UARTSendByte(uint8_t dat)
{
while ( !(LPC_UART->LSR & LSR_THRE) )
{
; // 等候数据发送结束
}
LPC_UART->THR = dat;
}
// 承受字符函数
/*****************************************************************************
** Function name:UARTReceiveByte
**
** Descriptions:Receive a block of data to the UART 0 port based
**on the data Byte
**
** parameters:None
** Returned value:Byte
**
*****************************************************************************/
uint8_t UARTReceiveByte(void)
{
uint8_t rcvData;
while (!(LPC_UART->LSR & LSR_RDR))
{
; // 查询数据是否接纳结束
}
rcvData = LPC_UART->RBR; // 接纳数据
return (rcvData);
}
// 接纳字符串函数
/*****************************************************************************
** Function name:UARTReceive
**
** Descriptions:Receive a block of data to the UART 0 port based
**on the data Length
**
** parameters:buffer pointer, and data length
** Returned value:Note
**
*****************************************************************************/
void UARTReceive(uint8_t *BufferPtr, uint32_t Length)
{
while (Length–)
{
*BufferPtr++ = UARTReceiveByte(); // 把数据放入缓冲
}
}
// 主函数
int main(void) {
// TODO: insert code here
uint8_t ch = 0;
UARTInit(9600);
LPC_UART->IER = IER_THRE | IER_RLS; // 设置中止使能寄存器
UARTSend((uint8_t *)Buffer, 10);
while (1)
{
ch = UARTReceiveByte(); // 接纳字符
if (ch != 0x00)
{
UARTSendByte(ch); // 发送接纳数据
}
}
// Enter an infinite loop, just incrementing a counter
volatile static int i = 0 ;
while(1) {
i++ ;
}
return 0 ;
}

 c510d9abb6b297dd281662e4c8c&t=1274344745¬humb=yes” rel=”nofollow” target=”_blank”>IMG_3380.JPG(70.52 KB)
2010-5-14 06:54
IMG_3381.JPG(76.79 KB)
2010-5-14 06:54
IMG_3382.JPG(72.08 KB)
2010-5-14 06:54

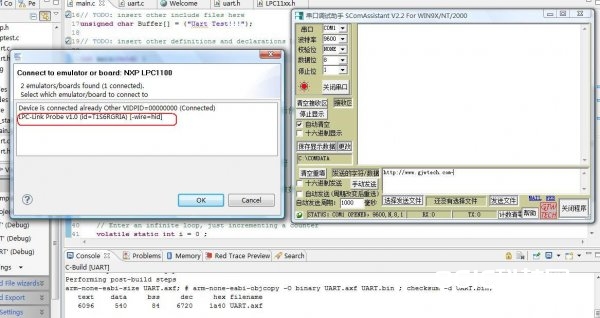
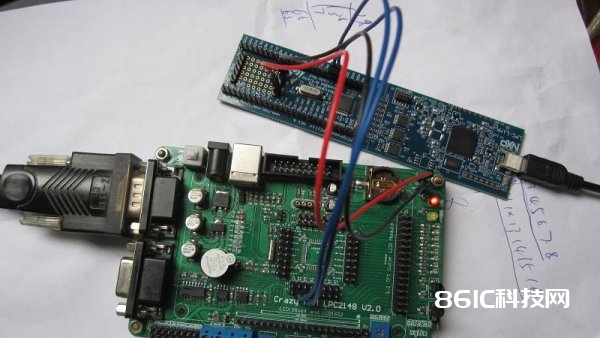
串口我用的是USB转串口进行调试的,假如先翻开串口进行,再衔接试验板时会提示如下:

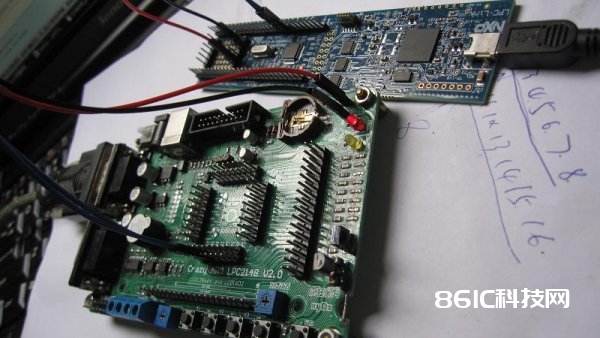
此刻假如点击”OK”,将提示如下过错:
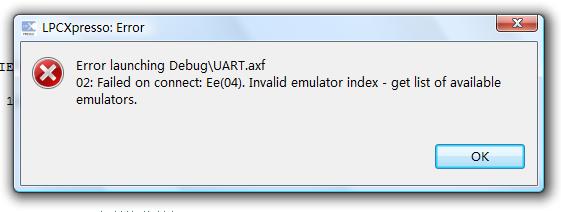
此刻应该点击如下图红圈的当地,LPC-Link,然后点击“OK”即可正常衔接。
-
2010-5-14 07:10